Tip of the Day: Do you want to know how to monitor and report on the changes made to your data in Microsoft D365 Finance and Supply Chain (D365 F&SC)? In this user guide, I'll show you how to use database logging to track and view the records that have been created, updated, or deleted in any data table throughout Dynamics 365 Finance & Operations.
To advance your consulting skills, let me share my Microsoft Dynamics D365 F&SC expertise with you by signing for my post notifications at www.intraclouddynamics.com or www.aliciakeener.com or subscribe to my YouTube Channel @aliciakeener6544 MVP Contributor ID = ?wt.mc_id=MVP_346423
#d365microsoftdynamics #microsoftdynamics365 #d365fo #d365 #dynamics365 #microsoft #intraclouddynamics #d365fscexpert #aliciakeener #alicia #mvpalicia #MVP #MVPBuzz #databaselogging
Database logging enables tracking and reporting of the creation, updates, and deletion of records in data tables throughout Dynamics 365 Finance & Operations. This user guide provides instructions for locating and exporting database logs related to specific records.
Steps:
1. Confirm the legal entity in the top right corner of the screen
2. Open the Navigation Pane and select the module containing the records in question
3. For this example, Accounts payable > All vendors was selected as an update to a vendor bank account record was in question
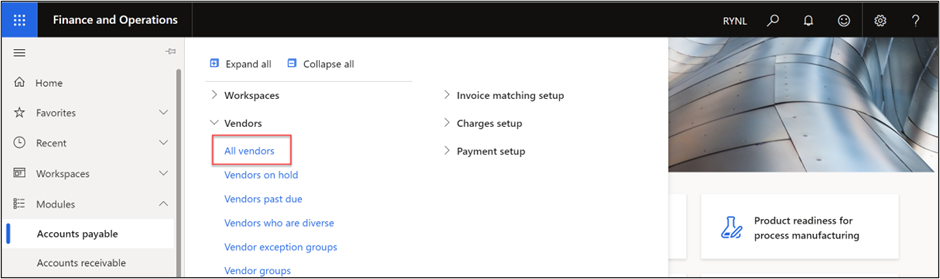
4. Select a vendor record, this will ensure the database log is filtered to changes made to that vendor record in the following steps
Note: There are reports to view all vendor record changes instead of changes to a specific field
5. In the Action pane, select the Vendor tab and select Bank accounts within the Set up section

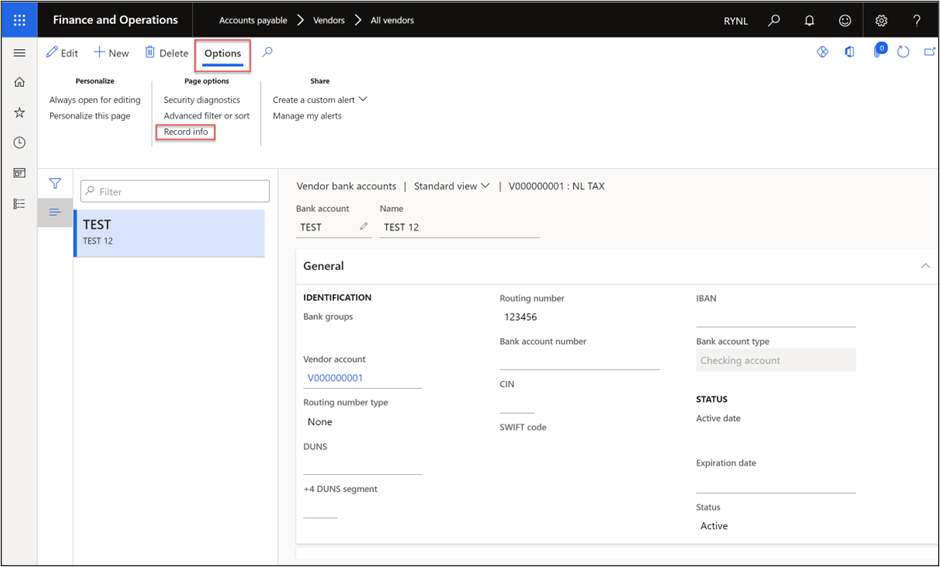
6. In the Action Pane, open the General tab and select Record info within the Page options section
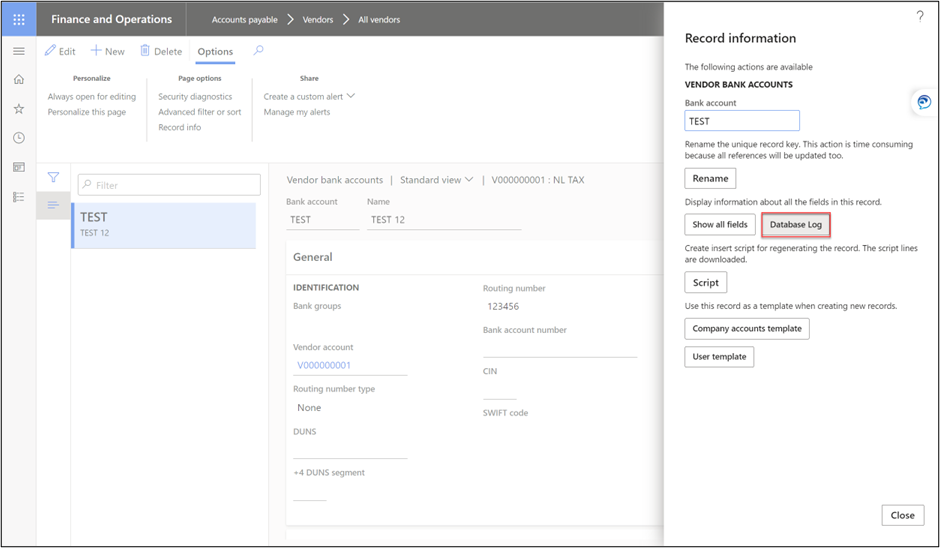
7. In the Record information page select Database Log
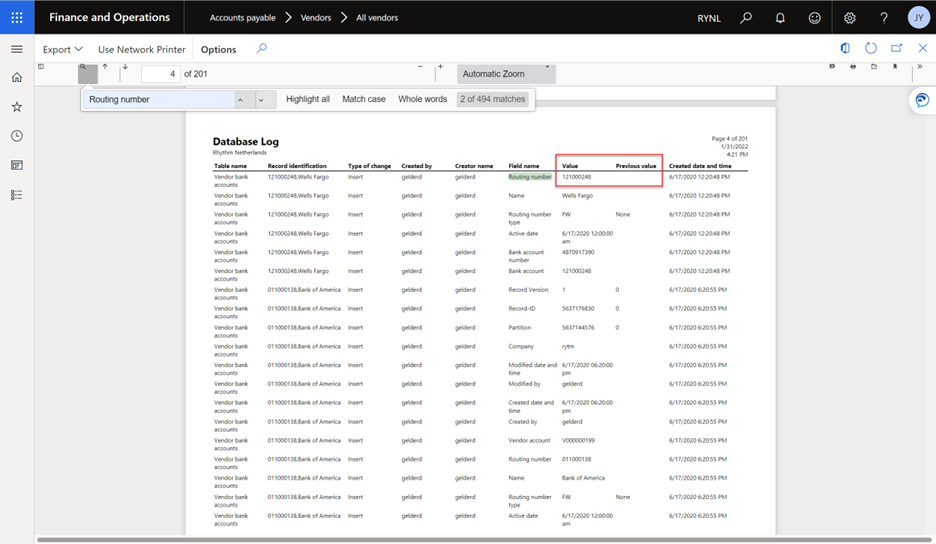
8. The table will display records related to the record selected in step 7
9. The following fields are highlighted in the screen shot below:
a. Reference table ID: the identification number for the Vendor bank accounts table
b. Record identification: the original record and new record value
c. Log RecId: the unique identifier for that particular record, in this case the TEST bank account
d. Type of change: Insert, Update, Delete
e. Creation date and time: the date and time of the change

10. This table does not show which field was updated on the vendor bank account record. In order to see this information, the database log must be exported
11. In the Action pane, select Database Log
12. Open Records to include and select Filter to add the following:
a. Reference table ID
i. Click Add + and select Reference table ID in the Field section
ii. Add 10342 as the Criteria, which was the Reference table ID shown in the Database Log page
See step 16 to find the table containing all Reference table IDs
b. Date range filters
i. Click Add + and select Created date and time in the Field section
ii. Add a single date or a date range
The formatting for a date range is MM/DD/YYYY.. MM/DD/YYYY
Note: Adding a date range filter is not required, but it will remove the records outside of the specified date range in the export

13. Click OK
14. Click OK in the confirmation window

15. Click Ctrl + F to search for the field name, in this case the search value is Routing number
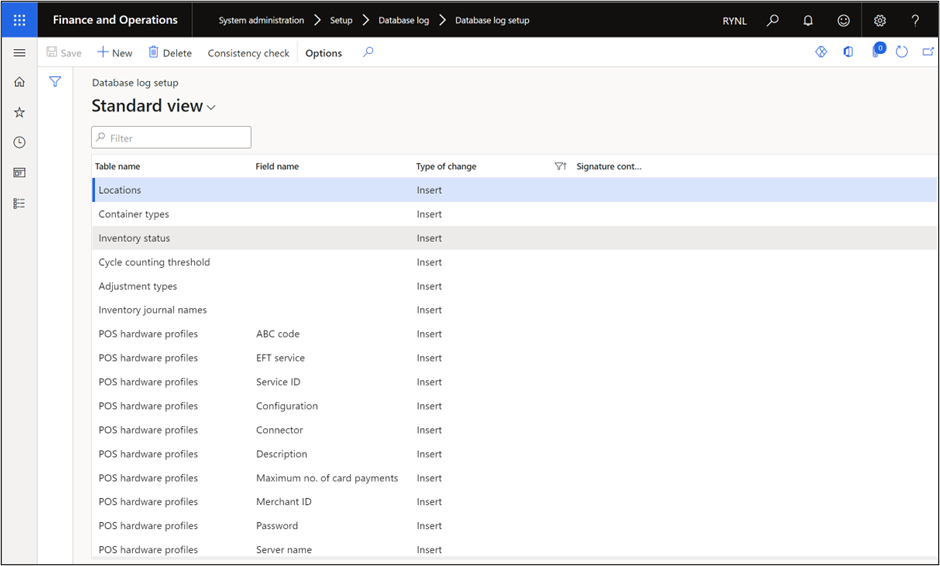
16. To view all the Tables and Fields that have database logging enabled, navigate to System Administration > Setup > Database log > Database log setup
Yorumlar